Red SUV with a camper topper parked on a rocky outcrop in a desert landscape.

Truck Camper Garage

TRUCK CAMPER BUYING GUIDE

Payload, wet weights, pop-ups, hard sides, construction, power. Everything you need to build the right rig, from the team that sells, builds and services them in San Diego.

So you're thinking about buying a truck camper. Where do you start?

You're reading about payload, wet and dry weights, pop-up truck campers, hard side campers, slide-in campers, flatbed campers, camper construction, ½ ton vs ¾ ton trucks, power systems, and suspension upgrades. It can all get confusing fast.

At Truck Camper Garage, we help people compare, buy, customize, install, and service truck campers in San Diego and Southern California. Whether you're looking for a lightweight truck camper for weekend trips, a four-season hard side camper, a pop-up overland camper, or a fully built off-grid truck camper setup, this guide is designed to help bring clarity to the process of building your dream truck camper rig.

We'll start with the basics, then get into the more complicated details. Use the table of contents to jump around to the sections you're looking to learn about, and please reach out if you have input that could help improve the guide.

Four things decide almost everything else — get these straight and the rest of this guide is just detail:

Start here

    Choosing a platform

    Truck camper types

    The type of camper you pick shapes the kind of trips you take. A topper sleeps you out of the elements at the trailhead. A slide-in gives you a full kitchen and bathroom for weeks-long trips. A flatbed or expedition build is a tiny home on wheels for going truly remote.

    We don't get too strict on definitions here. Simple topper setup or box truck / ambulance conversion, we'll call it a truck camper.

    Pickup truck fitted with a hard truck cap parked in the desert

    Truck topper / cap

    If you're starting really basic, you might just want a simple topper or cap to cover your truck bed. This gives you a lockable space where you can throw in a mattress to sleep, store gear, keep a cooler, maybe even add a battery bank. It's definitely the most budget-friendly option. The downside is the low ceiling; there's no standing room, and you'll have to crawl in and out.

    Best for
    The simplest and most affordable way to sleep in your truck. A good fit for weekend trips, and for hunters, climbers, and mountain bikers who need secure gear storage while keeping the everyday utility of the pickup. If you don't need standing room or built-in amenities, this is the cheapest way in.
    OVRLND camper topper on a flatbed utility bed

    Camper topper

    Camper toppers may look similar to a standard topper at first glance, but they often have taller walls, a pop-top roof, or a cabover for sleeping or storage. Some, like the Lone Peak Overland or AT Overland toppers, provide full standing room inside.

    Toppers only add a roof and walls, so the floor is your truck bed. They're great if you still want to use the bed to haul gear but want a comfortable place to sleep out of the elements. Camper toppers are a more affordable option for a full camper setup, and offer a blank canvas if you want to DIY the interior.

    Best for
    Stepping up from a basic topper without going full slide-in. You get standing room (whether from a pop-top or a taller fixed-roof design), a real sleeping cabover, and enough interior space to build out a small kitchen or seating area, while still using the truck bed for gear. Ideal for overland trips, extended weekends, or if you want to DIY the interior to your own spec.
    Scout hard sided slide-in truck camper at camp

    Slide-in campers

    Slide-in truck campers are the most common type and what most people picture when they think of a truck camper. They "slide" into your truck bed and are fully enclosed with four walls, a floor, and a roof. Most have a cabover bed and a built-out interior with features like a kitchen, seating, or even a bathroom. There are also "shell" models with empty interiors you can customize.

    Slide-ins can be removed from the truck with four corner jacks. Since they're fully enclosed (unlike toppers), everything comes out with the camper, and you can even camp in them off the truck. See slide-in truck campers for sale.

    If you want more storage or a cleaner look, you can swap your factory truck bed for a custom flatbed built for your camper. These beds offer extra space for gear, spare tires, fuel, water, and more. Check out our custom-made aluminum truck beds.

    Best for
    The comfort of a traditional RV while keeping the flexibility of a pickup. A popular choice if you're taking extended road trips, camping off-grid, traveling with family, or working remotely, and you want a self-contained camper with a kitchen, heating, and a bathroom.
    Flatbed AT Overland truck camper on a heavy duty pickup on a dirt road

    Flatbed campers

    Flatbed campers are similar to slide-ins, except they have a wider floorplan and won't fit inside a standard truck bed. The factory bed needs to be replaced with a flatbed, like our custom aluminum flatbeds. The main benefit of the wider floorplan is simple: more interior space. See flatbed truck campers for sale.

    Best for
    Maximum storage and interior living space. A strong fit if you're traveling full-time or spending weeks or months on the road, and the best platform if you're building a highly customized expedition rig.
    Heavy duty expedition truck camper built for remote travel

    Chassis-mounted or expedition campers

    Chassis-mounted or expedition campers are built directly onto a truck's frame, putting a custom box where a truck bed would typically be. Many Class C RVs, box truck conversions, and ambulance conversions also fit into this broader category. Some include a cab-to-camper pass-through for added convenience. These builds combine the durability of a utility vehicle with the comfort of an RV. They're ideal for extended travel in remote environments.

    Best for
    Serious long-distance travel in remote environments. The right pick if you're planning extended off-grid trips, international overland travel, or full-time living, and you value durability, storage, and self-sufficiency over compact size or easy removal.
    Truck camper type Standing room Kitchen Bathroom Off-road capability Weight Best for
    Truck topper / cap No Optional (DIY) No Excellent Very light Budget camping, gear storage, weekend trips
    Camper topper Yes Optional No Excellent Light DIY builds, overlanding, lightweight travel
    Slide-in camper Yes Yes Optional Very good Medium to heavy Weekend trips, road trips, off-grid camping
    Flatbed camper Yes Yes Often Very good Heavy Extended travel, full-time living, maximum storage
    Chassis-mounted / expedition camper Yes Yes Yes Very good Very heavy Long-term expeditions, remote travel, global overlanding

    Hard side vs pop-up (pop top)

    You'll see both "pop-up" and "pop top" used to describe the same style of camper; the terms are interchangeable. The hard side vs pop-up decision is a key one, but neither is strictly better. It just depends on the use case.

    Hard side truck camper parked in a forest

    Hard side

    Hard-sided campers stay full height all the time. They require no setup and handle cold weather and wind much better. But with a higher center of gravity, they don't perform as well off-road and have more clearance issues.

    Pop-up truck camper with the roof raised at an alpine campsite

    Pop-up

    Pop-ups (or pop-tops) have a roof that raises for standing height at camp and lowers while driving. The upper walls are typically soft-sided, although some hard-wall pop-ups are starting to appear. The soft wall is generally marine-grade vinyl, solution-dyed acrylic, or a vinyl- or acrylic-coated polyester — either a single layer, or fully insulated with a more breathable interior layer, and some offer an optional arctic layer, like the OVRLND. The main wins are lower overall clearance and better off-road handling from a lower center of gravity. Fuel economy can be slightly better, but the difference is often negligible. The tradeoffs are less insulation in cold or windy conditions, and the extra step of raising the roof (which may require removing roof-mounted gear first).

    Feature Hard-side truck camper Pop-up truck camper
    Interior comfort Excellent Good
    Cold weather performance Excellent Fair to good
    Off-road capability Good Excellent
    Center of gravity Higher Lower
    Overall height Taller Lower profile
    Wind resistance At camp: Excellent
    When driving: Fair
    At camp: Good
    When driving: Very good
    Fuel economy Slightly lower Slightly better
    Camp setup None Roof must be raised
    Interior storage More Less
    Best for Four-season camping, full-time travel, comfort Overlanding, rough roads, lightweight travel

    The foundation

    Truck Sizes

    Your truck is the foundation of your platform, so starting with the right one is key.

    A group of trucks with campers parked together in the desert
    Compact, mid size and full size trucks all carry campers — the differences are bed width, bed length and payload.

    Trucks in the US fall into three broad categories:

    Compact

    • Ford Maverick
    • Hyundai Santa Cruz

    Mid size

    • Toyota Tacoma
    • Ford Ranger
    • Jeep Gladiator
    • Chevy Colorado
    • Nissan Frontier

    Full size

    • Toyota Tundra
    • Ford F150/F250/F350/F450/F550
    • Ram 1500/2500/3500/4500/5500
    • Chevy/GMC 1500/2500/3500/4500/5500

    Bed size is mainly what we're concerned with since that's what we're trying to fit a camper in. The width between the wheel wells is what matters for usable camper floor space. Compact and mid-size trucks are similar in width, while full size beds are meaningfully wider. Bed lengths vary within each category. You can sometimes fit a mid-size camper in a full size truck, but not the other way around.

    When it comes to bed lengths there are some standard sizes, but each manufacturer does things slightly differently so these aren't meant to be exact measurements:

    Compact

    4.5′ bed

    Mid size

    5′ or 6′ bed

    Full size short

    5.5–5.8′

    Full size standard

    6.4–6.75′

    Full size long

    8′ bed

    Looking at the full size category, these can be broken down further into:

    ½ ton

    150 or 1500

    ¾ ton

    250 or 2500

    This is where the "heavy duty" or "super duty" category typically starts

    1 ton

    350 or 3500

    Can have single or dual rear wheel (DRW), often called "duallys"

    450/4500 and up

    450/4500, 550/5500

    Generally considered more "commercial" trucks but not uncommon for very large truck campers

    Terms like "short bed" and "long bed" don't have strict definitions and get used differently across truck classes. Use the bed lengths above as your reference, since that's what camper manufacturers will spec to.

    You'll want to look for campers that are designed to fit your truck bed size, but that doesn't mean the camper and truck need to be the same length. As an example, many 8′ campers are designed to work on 6.5′ beds. Look for truck fitment information, not just the length of the camper. If you shop all truck campers on our website you can filter by truck bed size.

    Common truck buying mistakes

    • Buying a truck before deciding on a camper.
    • Choosing a truck based solely on engine size or towing capacity.
    • Not verifying bed length compatibility.
    • Ignoring future upgrades like solar, batteries, bumpers, or larger tires that add weight.
    • Focusing only on today's camping needs instead of future travel plans.

    The number that matters most

    Payload

    Payload capacity is the most important thing to consider when putting together a truck camper. Payload capacity is not the same as towing capacity.

    Where to find your number

    Payload is not exclusive to trucks; all vehicles have a max payload and the number can be found on a sticker on the driver door frame or edge of the driver door. Every truck is different — even the same make, model, and year — because of factory options, so the only way to know is to check the sticker on your truck.

    Payload capacity is the amount of weight your vehicle can safely carry. This weight limit includes you, other passengers, pets, gear, your camper, aftermarket bumpers, roof racks, oversize tires, and anything else you put on or inside your vehicle. You need to ensure your truck can safely carry the wet weight (this includes water & fuel) of your camper plus passengers and anything else that you will bring along.

    A loaded truck camper rig parked in the mountains with people sitting outside
    Every accessory — bumper, rack, tires, batteries — comes out of the same payload budget as the camper.

    You'll often hear that certain campers require a 150/1500 or 250/2500 truck. These are general rules of thumb as a 2500 will typically have a higher max payload than a 1500, but the range can vary widely. For example, Ram makes their 1500 trucks with payloads ranging from about 1,200 to 2,300 lbs and their 2500 trucks range from 1,600 to 4,400 lbs of payload.

    Payload capacity cannot be increased except by specially certified mechanic shops in certain states. You'll often hear people talk of increasing payload by adding higher rate springs or airbags, but what they really mean is improving the ability of the truck to handle a higher load. That doesn't change the payload rating of the vehicle.

    There are many other factors that go into payload such as the frame, axles, tires, brakes, engine & transmission cooling, etc. Adding springs or airbags with more load capacity can drastically improve ride quality when carrying a camper. See the truck suspension section for guidance on when upgrades become worthwhile based on remaining payload capacity.

    Truck class Typical payload range Common camper types
    Compact 1,200–1,700 lbs Lightweight toppers, micro campers
    Mid-size 1,200–1,800 lbs Lightweight pop-ups, camper toppers
    Half-ton (150/1500) 1,200–2,300 lbs Lightweight pop-ups, select slide-ins
    Three-quarter ton (250/2500) 1,600–4,400 lbs Most slide-in campers, many flatbeds
    One-ton (350/3500) 3,000+ lbs (varies) Large slide-ins, flatbeds, expedition campers

    Common payload mistakes

    • Confusing payload capacity with towing capacity.
    • Using a camper's dry weight instead of its fully loaded (wet) weight.
    • Forgetting to include passengers, pets, gear, aftermarket bumpers, larger tires, roof racks, or batteries.
    • Assuming every truck with the same make and model has the same payload rating.
    • Believing airbags or heavier springs increase a truck's legal payload rating. They improve handling, not payload.

    Reading the spec sheet

    Camper weights

    Finding out the actual weight of a camper can sometimes be frustrating. Wet weights, dry weights, with standard features or with options — it can be very confusing. Here's a breakdown.

    Term What it actually means
    Weight with standard features The weight of the camper with no extra options added. Very few campers ship without options, but if you're trying to keep weight down, you can order a model with none added.
    Weight with factory options Weight with standard features plus the weight of factory options.
    Dry weight Weight of the camper without fluids like water or propane.
    Wet weight Weight of the camper with fluid tanks full.

    Most manufacturers provide a dry weight, which is a good way to compare campers since larger tanks aren't a downside, even though they'll make the camper weigh more when full. Just remember you'll need to consider the weight of fluids on top of that.

    Check both stickers

    Most campers have two weight stickers: one outside with the standard features weight, and one inside with the factory options weight. Whether those are dry or wet weights varies by manufacturer due to different interpretations of RVIA guidelines. To know for sure, check the manufacturer's website.

    Scout Olympic pop-up and Adventurer 80RB hard wall slide-in truck campers

    Fitment

    Camper lengths

    Campers come in a wide range of lengths, from 5' up to 11' and longer. When matching a truck and camper, the length of the camper is less important than truck fitment. You'll want to look for campers that are designed to fit your truck bed size, but that doesn't mean the camper and truck bed need to be the same length. As an example, many 8′ campers are designed to work on 6.5′ beds.

    If you shop all truck campers on our site, you can filter by truck bed size.

    Some campers fit inside the truck bed with the tailgate closed, while others extend out past the bed. Consider how much it extends for overall vehicle length and clearance for towing or hitch accessories like bike racks.

    On overhang

    A camper that extends past the bed is still stable as long as the center of gravity is at or in front of the rear axle. Camper manufacturers design to meet this requirement, so just make sure the camper is designed for your bed size.

    Truck camper fitted to a pickup bed showing overall proportions
    Look for truck fitment information, not just the length of the camper.

    Ride quality

    Truck suspension

    Suspension modifications are often needed to keep your rig safe and comfortable to drive.

    When upgrades are worth it

    As a rough guideline: when you have less than 1,000 lbs of payload capacity remaining, it's worth considering upgrades to improve your truck's load carrying ability. Under 500 lbs, upgrades are strongly recommended. Even within your truck's safe weight range, factory springs are typically tuned for the middle of that range, not the top of it.

    Truck camper rig on a rough desert road with the suspension loaded
    Whether you're climbing a sand bank in the desert or a rocky back road, the right suspension makes the trip smoother.

    Bump stop replacement

    Timbren and Sumo Springs are the most budget-friendly option. They replace your factory bump stop with a larger rubber or foam piece to help support extra weight. Parts and installation are cheap, but you'll limit suspension travel and get a rougher ride, since the bump stop is engaged nearly all the time under load. Ok for pavement, not recommended for rough roads.

    Air bags

    Air bags are the most versatile option. You can change spring rate in seconds by adjusting air pressure, which is useful if the camper is only in your truck for trips and you drive empty most of the time. It also means you don't have to redo your suspension if you switch to a different camper. Like bump stops, air bags limit suspension travel, but not as much.

    Spring replacement

    A full spring replacement is the best-performing option. The tradeoffs are higher up-front cost and a stiffer ride when the camper isn't in the bed. In return, your suspension works exactly as designed with full travel available, which translates to significantly better ride quality than the options above. For heavy off-road use or the best comfort and handling loaded, this is highly recommended.

    Add-a-leaf kits and leaf pack rebuilds are essentially the same approach done at the pack level. A spring shop adds or swaps leaves engineered to match your factory pack. Done well, the result rides and holds up close to a full replacement.

    Helper or overload springs are the budget alternative. An extra leaf bolts on top of your factory pack and engages as the truck squats under load. It's inexpensive and reversible, but the load still runs through the factory leaves and the bolt-on hardware, so it's a supplement to the pack rather than a redesign of it. Under a camper that lives on the truck, that means a harsher loaded ride and more wear on a pack that was never engineered for it.

    Upgraded shock absorbers

    Better shocks improve comfort and handling, reduce body sway and roll, and cut down on wear and tear on the truck and camper. If you're comfortable, your camper and truck probably are too.

    Owners of heavy duty trucks (¾ ton/2500 and up) often complain about how rough these trucks ride. Part of it is that the springs are stiff to handle heavy loads, but another key factor is that the factory shocks aren't sized or built to match those heavy-duty springs. A good aftermarket set (2.5″ diameter minimum recommended for heavy duty trucks) can completely change how these trucks ride and drastically improve comfort and handling.

    Option How it works Suspension travel Relative cost Best for
    Bump stop replacement Larger rubber or foam piece replaces the factory bump stop to help support extra weight Most limited — engaged nearly all the time under load Lowest (parts and install are cheap) Pavement. Not recommended for rough roads
    Air bags Spring rate changes in seconds by adjusting air pressure Limited, but not as much as bump stops Moderate Campers that only go in for trips, or if you may switch campers later
    Full spring replacement Suspension works exactly as designed for the load Full travel available Highest up front Heavy off-road use and the best comfort and handling loaded
    Add-a-leaf / leaf pack rebuild A spring shop adds or swaps leaves engineered to match your factory pack Close to a full replacement when done well Moderate Getting close to full-replacement performance at the pack level
    Helper / overload springs Extra leaf bolts on top of the factory pack and engages as the truck squats Load still runs through the factory leaves and bolt-on hardware Lowest, and reversible Occasional loads. Harsher ride and more wear if the camper lives on the truck
    Upgraded shocks Improves comfort and handling, reduces body sway and roll Complements the spring choice Moderate Any heavy camper. 2.5″ diameter minimum for heavy duty trucks

    We install suspension packages in house — see builds & installs if you'd like us to spec a setup for your rig.

    Common suspension mistakes

    • Installing suspension upgrades before confirming the truck is within its payload rating.
    • Assuming airbags alone solve every handling issue.
    • Skipping upgraded shocks when carrying a heavy camper.
    • Focusing only on rear suspension while ignoring tire ratings.
    • Choosing the cheapest suspension option instead of the one that matches how the truck will be used.

    How it's built

    Camper construction

    How a camper is built affects its durability on rough roads, how it ages, and what it costs to repair down the line. This is one of the most important things to understand before buying, since you're making a significant investment and these tradeoffs play out over years of ownership.

    Truck campers lined up inside the Truck Camper Garage showroom
    Construction differences are much easier to judge in person. Our San Diego showroom carries all of the build styles below side by side.

    Conventional framed campers

    This is the traditional way RVs and campers have been built for decades. A wood or aluminum stud frame forms the skeleton of the camper, and exterior walls (typically laminated fiberglass or composite skins over insulation) get attached to that frame. The frame carries the primary structural loads, while the skin adds some rigidity.

    The approach has real advantages, which is why it's stayed dominant. It's the most affordable way to build, so it covers the widest range of price points and floorplans, from entry-level units to premium multi-slide builds. The materials and methods are well understood, and because almost every RV shop knows how to work on framed construction, repairs and parts are easy to source just about anywhere.

    Framed construction relies on sealants at the seams, so resealing is part of ownership. Frame-and-panel builds have joints where the walls meet the floor, roof, slide-outs, windows, and doors, and each one depends on caulking and sealant to keep water out. Those seals need inspection and periodic resealing, which is ongoing work and cost over the life of the camper. It's manageable and predictable, but it does need doing. Skip it, or start with a poorly built camper, and water can get in and rot wood framing, delaminate walls, or corrode aluminum framing.

    Framing material matters here too. Aluminum studs conduct cold more readily than wood, acting as thermal bridges that can show up as condensation lines where the framing runs. Wood avoids that but is more vulnerable to water damage. Different tradeoffs, neither strictly better.

    Build quality varies widely across framed campers. Framing material, sealant quality, and how well the seams are detailed all differ between manufacturers and make a real difference in how a camper ages. A well-built, cared-for framed camper lasts 20+ years, while a poorly built or neglected one can develop rot in under 10. Repairs are usually moderate and straightforward when you catch damage early and it's localized, but widespread water intrusion gets expensive.

    Best suited to pavement and moderate dirt roads. With many fastened joints and seams, there are more points that can work loose under long-term vibration, though a well-built camper with quality fasteners holds up well.
    Adventurer 80RB truck camper
    Conventional framed construction: Adventurer.

    Composite panel construction

    A more modern approach using single-piece panels that require no internal framing. The walls, roof, and floor are composite panels: closed-cell foam core sandwiched between fiberglass or aluminum facings. These panels are bonded together to form a rigid shell. Aluminum framing is added where panels meet and around door and window openings, giving the panels something solid to bond to and reinforcing the areas that carry the most load.

    The main advantage is that there's no internal framing to rot and no separate insulation to settle, and the closed-cell foam core doesn't absorb water the way wood framing can. It also means no thermal bridging, since there's no framing running through the wall to conduct cold or create condensation.

    Seams still need maintenance. Panels meet at the corners, roof, and floor, and there are seals around every window, door, and roof penetration. Those need the same inspection and periodic resealing as any other camper. How many seams you're maintaining depends on the builder: some use fewer, larger panels, which means fewer joints to seal.

    The tradeoff is repair complexity. Surface damage to the fiberglass facing is moderately priced to fix with standard techniques, but if damage reaches the bonded foam core, repair gets specialized and expensive, sometimes requiring panel replacement. Composite campers also tend to sit in the mid-to-upper price range because of the manufacturing process.

    Build quality matters here as much as anywhere. Panel strength depends on the bond between the facings and the core, and on how well the edges and joints are detailed. A well-built composite camper is exceptionally durable, but a poor bond can delaminate over time.

    These hold up very well off-road because bonded panels share loads across the whole structure rather than concentrating stress at frame joints.

    In our lineup: Scout and AT Overland use this construction.

    Scout Yoho hard wall truck camper going through mud
    Composite panel construction: Scout.

    Molded fiberglass clam-shell construction

    Two large molded fiberglass pieces (a top and bottom shell) join to form the camper. The curved shape of the shells is part of what makes them strong — the geometry distributes loads across the whole structure rather than concentrating them at corners or joints. Key mounting points and openings get extra reinforcement.

    This style has fewer seams than framed construction. The main one is where the top and bottom shells join, plus the standard seals around windows, doors, and roof vents. That makes it inherently water-resistant. With no framing running through the shell, there's also no thermal bridging to create cold spots or condensation, so insulation performance stays consistent. The continuous curved shape looks distinctive and tends to age well aesthetically.

    Downsides: manufacturing requires expensive tooling, so these typically sit in the mid-to-premium price range. Surface damage to the fiberglass is moderate to repair, but if structural sections of the shell are compromised it can be expensive.

    Off-road performance is strong because the continuous shell handles flexing well, distributing stress through the curved geometry instead of concentrating it at seams or joints.

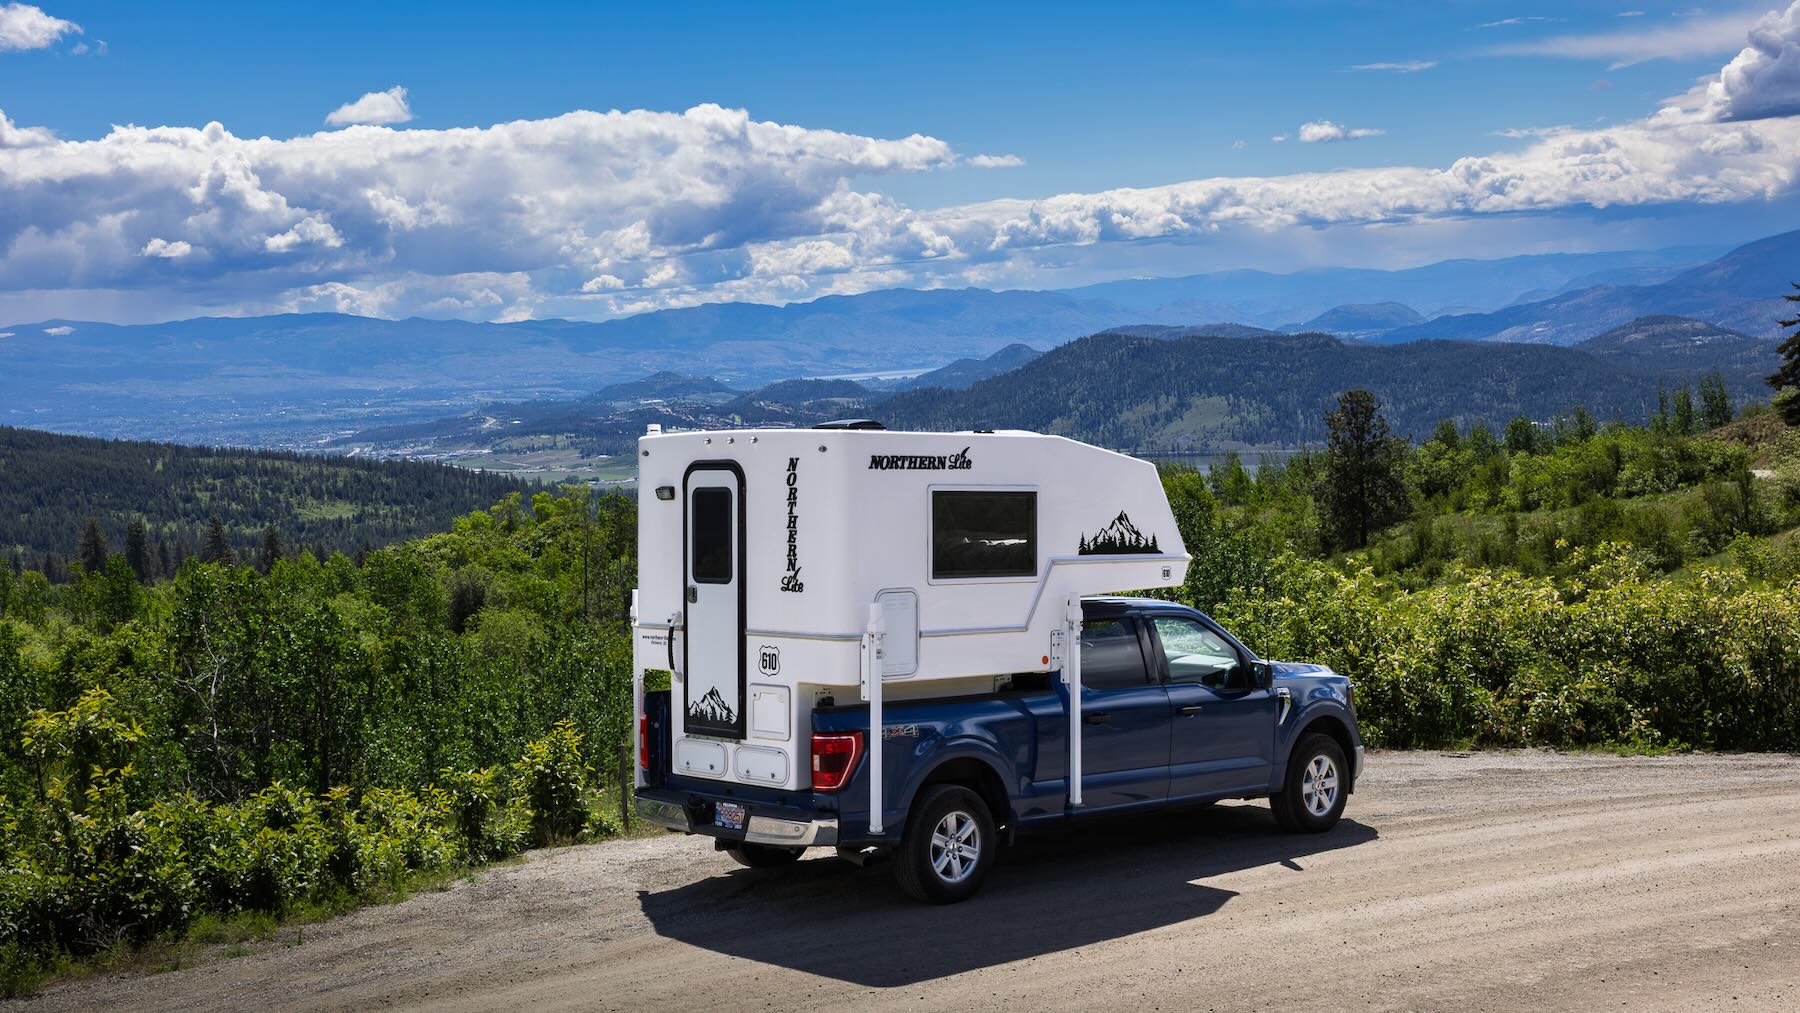
    In our lineup: Northern Lite uses this construction, and Scout uses this method for the single-piece fiberglass roofs on their pop-ups.

    Northern Lite 610 molded fiberglass truck camper
    Molded fiberglass clam-shell: Northern Lite.

    All-aluminum builds (toppers)

    An aluminum frame or shell with skin panels, where structural integrity comes from the frame, the panels themselves, or both. Simpler than conventional framed construction, without the interior wall panels, separate insulation batts, and layered assembly.

    The main win is corrosion resistance. Aluminum doesn't rust. The frame approach also makes it easy to add mounting points for racks, awnings, and gear. The tradeoff is insulation. Aluminum framing conducts cold well, creating thermal bridges through the wall that reduce effective insulation and can show up as condensation on interior surfaces where the framing runs. For summer or mild-weather use this isn't a major concern, but it's worth factoring in if you plan to camp in freezing conditions.

    Three main variations, and the differences matter for durability and repair:

    • Bolted extrusion construction. Custom aluminum extrusions bolt together to form the frame, and pre-finished aluminum composite panels bond on with structural adhesives. No welding keeps costs down and makes repair simpler, since damage is usually isolated to a single panel or piece of hardware. The tradeoff is seams wherever panels meet, including at the roof, relying on sealants that need occasional attention.
    • Welded frame construction. A hand-welded aluminum frame with aluminum skin panels welded, riveted, or bonded on. Solid aluminum panels stay UV-stable over decades. Build quality is what matters most here: sound welds from a skilled fabricator hold up for the long haul, while poor welds are the main long-term risk. Any repairs need someone who can weld thin-wall aluminum well.
    • Welded composite panel construction. The most sophisticated approach in this category. Aluminum-skinned composite panels (aluminum facings bonded to a honeycomb core) form the walls and roof, and the aluminum skins are welded together at the panel edges to create a continuous shell, with reinforcement at hardpoints. Because the walls and roof are welded directly, there's no seam at the top of the shell (historically the most water-exposed joint on any RV) and no roof-to-wall sealant to maintain. The panels provide structure, insulation, and finish in one integrated piece. Precision fabrication and specialized repair are reflected in the price, but the finished product is exceptionally durable and low-maintenance.

    All three perform well off-road thanks to the structure's ability to flex without damage. Longevity is strong when the build quality is there.

    In our lineup: AT Overland (welded composite panel), Lone Peak (bolted extrusion), and OVRLND (welded frame) all use this construction.

    OVRLND Bread n Butter aluminum camper topper with the roof popped
    All-aluminum topper: OVRLND.

    Hybrid / pop-up construction

    A fixed base structure (built using any of the above methods) combined with a lifting roof and flexible upper wall assemblies. When the roof is lowered, the camper is compact for driving. When raised at camp, you get full standing room. The walls of the pop-up section are typically a soft fabric — generally marine-grade vinyl, solution-dyed acrylic, or a vinyl- or acrylic-coated polyester — in single-layer or insulated versions.

    The added complexity comes from moving parts: hinges, lift mechanisms (manual, hydraulic, or electric), and the seal where the roof meets the walls when closed. These all introduce wear points that fixed-shell campers don't have.

    Cost varies widely depending on system complexity. Simpler manual-lift designs are usually more affordable, while powered lift systems sit at the premium end. Longevity is solid in simpler designs but declines as mechanical complexity increases, especially if the camper sees heavy use. Repair costs tend to be moderate. Fabric and seals eventually wear out and need replacement.

    Off-road performance is strong when the design is kept simple. The lower overall height also helps clearance and stability on rough terrain. The catch is that the mechanical systems need ongoing maintenance, especially with regular off-road use.

    In our lineup: Scout, Lone Peak, OVRLND, and AT Overland all offer pop-up designs.

    Scout Yoho pop-up truck camper with the roof raised
    Hybrid / pop-up construction: Scout Yoho.
    Construction What carries the load Water intrusion Thermal bridging Off-road In our lineup
    Conventional framed Wood or aluminum stud frame with skins attached Biggest concern — many seams relying on caulking and sealant Yes with aluminum studs; wood framing avoids it Pavement and moderate dirt roads Lance, Adventurer
    Composite panel The bonded foam-core panels are the structure Closed-cell foam doesn't absorb water; no framing to rot None — no framing runs through the wall Very well — loads share across the whole structure Scout, AT Overland
    Molded fiberglass clam-shell Two curved molded shells; the geometry distributes load Fewer seams — inherently water-resistant None Strong — the continuous shell handles flexing well Northern Lite (and Scout pop-up roofs)
    All-aluminum (toppers) Aluminum frame, the panels, or both Varies by method; welded composite panels have no roof seam Yes — aluminum conducts cold well All three variations perform well AT Overland, Lone Peak, OVRLND
    Hybrid / pop-up Fixed base plus a lifting roof and canvas upper walls Seal where the roof meets the walls; fabric wears out Depends on the base construction Strong when kept simple; lower height helps clearance Scout, Lone Peak, OVRLND, AT Overland

    Common construction mistakes

    • Assuming all fiberglass campers are built the same.
    • Looking only at the purchase price instead of long-term maintenance costs.
    • Overlooking water intrusion and seal maintenance.
    • Prioritizing weight over durability.
    • Not considering how easy a camper will be to repair after years of use.

    Keeping it on the truck

    Camper mounting

    How your camper mounts to your truck depends largely on the camper itself, so it's not a fully separate decision from which camper you buy. The main thing to know is what's included and what you'll need to add.

    Don't cheap out here

    Tie-down costs can add up quickly, but this is the only thing keeping your camper on the truck, so it's worth investing in a good setup. Standard practice is four anchor points: two front, two rear. A rubber bed mat is also worth adding to reduce shift and protect the bed (some manufacturers require it for warranty) — we include one as a standard item in our camper install packages.

    Slide-in truck camper with overlay showing center of gravity sweet spot and the four main features of mounting system
    The key parts of a slide-in mounting setup at a glance.

    Tie down points

    Anchor type Where the load goes Notes
    Frame mounts Directly into the truck frame The strongest option and standard for heavier slide-ins. Brackets bolt onto the frame and extend past the bed to give the turnbuckle a solid anchor. Most full-size slide-in manufacturers recommend them.
    Bumper mounts Rear bumper, typically paired with bed or frame mounts at the front The bumper has to be rated for the load, and many factory bumpers aren't. Worth checking.
    Bed-mounted tie-downs The truck bed itself — factory tie downs (if rated) or eye bolts installed in the bed Because the load goes into sheet metal rather than the frame, these are better suited to lighter campers.
    In-bed frame-anchored tie-downs Through the bed into a bracket on the frame Sit flush with the bed. Frame-mount strength with a clean look when the camper isn't loaded. Torklift's ApexAnchors are the main example.

    Hardware

    Hardware What holds the tension Backs off from vibration? Notes
    Ratchet straps Webbing and ratchet Webbing has more give, so the camper can shift on rough roads Come standard with some lighter campers like Scout and the Northern Lite 610. They use factory cargo anchors and work fine for most users. Webbing degrades over time. Ratchets can be swapped for metal turnbuckles using the same camper anchor points.
    Standard turnbuckles Threads and friction Yes — needs a jam nut and regular checks A rigid threaded rod with hooks on each end. With no give in the system, truck flex transfers straight into the camper's anchor points, which can crack hardware over time.
    Spring-loaded turnbuckles Threads, with a spring in line Yes — tension is still held by threads The spring lets the truck and camper flex independently, protecting anchor hardware. Most include a tension indicator for hitting the manufacturer-spec 300 lbs at each anchor point. Torklift's SpringLoad XL is a common example.
    Quick-disconnect (FastGun-style) Threads set the length; a cam-action lever provides final tension No — once locked, it holds on its own Combines spring-loading with a cam-action lever. The lever lets you tension or release in seconds without tools. The Torklift FastGun is the most popular option.
    Custom AlumaTray aluminum flatbed fitted to a pickup truck
    Swapping the factory bed for a custom aluminum flatbed changes the mounting interface as well as the storage.

    Flatbed mounting

    Flatbed campers handle mounting differently. Instead of dropping into a truck bed and tensioning turnbuckles, a flatbed camper attaches rigidly to the deck at engineered hard points, so most of the tie-down hardware above doesn't apply. If you're pairing a camper with one of our custom aluminum flatbeds, we build the mounting interface to match the camper as part of the install.

    Living off-grid

    Power systems

    Power systems are where a lot of buyers get stuck: amps, volts, watts, inverters, DC, AC. Once you break it down it's pretty simple, and getting it right is what lets you boondock for a week without driving to a campground to recharge, or work from your camper at the edge of a lake.

    Truck camper with a solar panel deployed at a remote campsite

    What are volts, amps, and watts?

    Let's start with the core building blocks of any electrical system:

    Volts (V)

    The pressure pushing electricity through a wire.

    Amps (A)

    How much electricity is flowing, like the volume of water in a hose.

    Watts (W)

    How much power is being used overall: Watts = Volts × Amps.

    So, if you're running a 12V fridge that draws 5 amps, that's 60 watts of power. Run it for 10 hours, and you've used 600 watt-hours (or 50 amp-hours) of energy from your battery.

    A quick note on AC vs DC power

    We won't go deep into the differences between AC (alternating current) and DC (direct current) in this guide, but here's a simple reference to avoid confusion: 12V, 24V, and 48V systems are DC power, used by most camper electronics. 110/120V systems are AC power, like the outlets in your home. So when we mention 110/120V appliances, they will always be AC, typically powered by an inverter, generator, or shore power.

    Why truck campers use 12V power

    Truck campers and RVs almost universally use 12V DC power systems. It's a practical choice rooted in how vehicles are built:

    • Automotive compatibility: Your truck already runs on a 12V system, so powering your camper from the same source (alternator, battery, wiring) just makes sense.
    • Simplicity and safety: 12V systems are safe to work with and don't require specialized tools or electricians.
    • Availability: There's a massive market of 12V gear — fridges, fans, lights, diesel heaters, and chargers all designed for this system.

    For most truck camper owners, 12V is the best starting point.

    When higher voltage systems make sense

    12V is the standard in campers and vans, and it handles more than people expect, including 120V air conditioning through a large inverter.

    You'll see 24V and 48V systems in some builds because higher voltage moves the same power at a fraction of the current. That means smaller, less expensive cable, less voltage drop over long runs, and less heat in the wiring. A single DC-to-DC converter after the battery feeds the 12V accessories, so running the usual lights, fans, and fridges isn't a problem.

    The tradeoff is serviceability. 12V is what nearly every camper accessory, RV shop, and mobile tech is set up for, so parts are easy to find and most owners can safely troubleshoot their own system. Higher voltage DC requires more care to work on and fewer shops are equipped for it, which matters when something fails far from home.

    Higher voltage generally makes sense on a new build designed around big loads from the start, particularly with long cable runs, a large solar array, or multiple inverters. For most campers, and especially for anything already wired at 12V, there's rarely a reason to change.

    How much power do you actually need?

    To plan your setup, you'll want to estimate how many amp-hours (Ah) your devices will draw from your battery each day. Here's a simplified chart showing common truck camper devices, from essentials to energy hogs:

    Device Current draw (amps @ 12V) Runtime (hrs/day) Daily amp-hours (Ah)
    LED lights (full setup) 2.0 A 4 hrs 8 Ah
    12V fridge (compressor cycling) 4.5–5.0 A 12 hrs 54–60 Ah
    Roof fan 1.5 A 8 hrs 12 Ah
    Laptop (12V USB-C charger) 5.0 A 2 hrs 10 Ah
    Air conditioner (DC or 120V on inverter) 55–140 A 3–6 hrs 165–700 Ah

    Note that runtime hours represent the time a device is actually drawing power. A fridge runs 24 hours a day but its compressor only cycles on roughly half that time, so 12 hours of compressor time is typical.

    Rule of thumb

    Typical daily use for a basic rig (lights, fridge, fan, charging) often falls between 70–100Ah. If you're planning to run an air conditioner or other high-demand appliances, plan for 300–600Ah or more.

    Battery types: lead-acid vs lithium

    AGM or lead-acid batteries are cheaper up front but heavier, slower to charge, and only offer about 50% usable capacity.

    Lithium (LiFePO₄) batteries are lighter, charge faster, last longer, and give you nearly 100% usable capacity. They cost more up front, but they're a smart investment if you spend a lot of time off-grid.

    Charging your camper: solar, alternator, and more

    Solar power. Most off-grid setups rely on solar as a primary energy source. Panels feed power into a charge controller (preferably MPPT), which then safely charges your battery bank. A 200W–400W array is typical in truck campers and can generate roughly 60–120Ah per day in good conditions, less in cloudy weather or shade.

    Alternator charging. Solar is great but not always reliable in cloudy weather or shade, so having a backup matters. Wiring the camper to charge off your truck's alternator is reliable and fast. We wire most setups to charge at 50 A (600 W), which puts up to 100 Ah back into the battery system over a 2 hour drive.

    Shore power. When you're at home or in a campground, plugging into a 110/120V outlet is a very fast way to top off your batteries.

    Generators. Generators are loud, heavy, and less common in truck campers, but they're still useful for backup charging or running big appliances in a pinch.

    Do you need an inverter?

    You need an inverter if you plan to use 110/120V AC appliances like air conditioners, coffee makers, or power tools. A pure sine wave inverter is safest for electronics. Inverter sizes vary depending on what you're powering:

    12V devices run straight off the battery — the inverter only steps in for 120V household appliances.
    Inverter size What it will run
    300–500W Small electronics
    1,000–1,500W Kitchen gear, small tools
    2,000W+ Induction cooktops, larger appliances
    3,000W+ Air conditioning

    Inverters draw power even when idle and are roughly 85–95% efficient, so for small loads like phone and laptop charging, running gear directly on 12V is the more efficient path. The exception is anything you already own in a 120V version, where the cost of switching outweighs the efficiency gain.

    Common electrical system mistakes

    • Buying too little battery capacity.
    • Relying entirely on solar without alternator charging.
    • Purchasing appliances before sizing the electrical system.
    • Using an inverter for small loads that could run directly on 12V, like phone and laptop charging.
    • Underestimating how much power air conditioning requires.

    Year-round comfort

    Heating & cooling

    Your heating and cooling setup is what makes your camper livable year-round. Whether that's a winter hunting trip in the snow, surfing the coast in the summer, or chasing fall colors through the mountains, the right setup keeps you out exploring longer.

    Hard side truck camper set up at a shaded forest campsite

    Heating options

    Diesel or gas heaters

    Efficient, 12V-powered systems that burn fuel from a separate tank or line. They provide steady, dry heat with minimal battery draw, making them a popular choice for off-grid or cold-weather use.

    Propane furnaces

    Commonly built into many campers from the factory. They offer fast, powerful heat, and since most campers already use propane for cooking, using it for heat keeps fuel types consistent. Traditional propane systems can introduce moisture to the air, but many modern units eliminate this by separating combustion from interior airflow.

    Portable propane heaters

    Budget-friendly and easy to use but best for short-term or emergency use. Since they're unvented, they release moisture and require a cracked window and CO detector. They're not recommended for overnight heating.

    Electric heaters

    Effective when plugged into shore power. They're clean and quiet, but heating with electricity is far less efficient than burning fuel, so a diesel or propane heater is the better choice off-grid.

    What "four-season" really means

    "Four-season" isn't a standardized rating. What makes a camper truly usable in freezing temperatures is whether heat gets ducted to the water lines, holding tanks, and plumbing runs, not just the cabin. Without that, pipes can freeze even when the interior is warm. This is also why some campers skip built-in plumbing entirely and use portable water containers instead: no pipes means nothing to freeze. Either approach works for cold weather; it comes down to which tradeoff you prefer.

    Cooling options

    Roof vent fans are the most efficient cooling method for moderate climates. They exhaust warm air and pull in cooler outside air, improving airflow and comfort with very little power draw. They don't lower air temperature but make a big difference when paired with open windows.

    DC air conditioners (12V, 24V, or 48V) run directly off your battery system without an inverter. They're more efficient than a standard 120V unit, mostly because they use variable-speed compressors that throttle down to match demand instead of cycling full-on and full-off. The catch is cost and installation. They often run two to three times the price of a comparable 120V unit for less cooling capacity, and retrofitting one into an existing camper means running much heavier cable up to the roof.

    110/120V AC units are what most campers come with from the factory. Out of the box they only run on shore power or a generator, but with a large inverter, a soft start, and enough battery, you can run the unit you already have off your batteries. The efficiency gain from a DC unit is real, but smaller than the price difference suggests. For most people who already have a 120V rooftop unit, putting that money into inverter and battery capacity can be the cheaper path to off-grid air conditioning. It's an upgrade we do regularly — see builds & installs.

    Keeping food cold

    Safe food storage (fridges)

    Keeping food cold is a basic of camper life. Your options come down to powered fridges or traditional coolers.

    12V compressor fridges / electric coolers

    The most common choice in modern camper builds. They run on 12V DC, use a compressor like a home fridge, and are built for mobile, off-grid use. Unlike absorption fridges, they don't need to be level and cool down to temp in a few hours. Front loading and top loading "chest-style" models are both available. Chest-style is more efficient since cold air doesn't spill out when opened, while uprights offer easier organization. Many can run as a fridge or freezer, and some have dual-zone compartments for both.

    They're efficient, drawing around 1 to 5 amps depending on temperature and usage, and they work whether you're driving, parked, or off-grid. The tradeoff is a higher upfront cost and the need for a well-supported battery setup, ideally with solar or alternator charging.

    Absorption fridges (2-way or 3-way)

    These fridges run on propane, 120V AC, and sometimes 12V DC (hence 2-way or 3-way). They were the RV standard for decades because, before lithium batteries became practical, propane was the only way to keep a fridge running off-grid for any length of time. Most manufacturers have moved away from them in favor of 12V compressor fridges paired with lithium batteries.

    The downsides are real. They need to be kept reasonably level to work (manufacturers typically spec within about 3° side-to-side and 6° front-to-back), take 10–12 hours to cool down, perform poorly in hot weather, and are inefficient on 12V DC. They can still make sense in propane-heavy setups with limited battery capacity, but in most modern builds a 12V compressor fridge is the better choice.

    Coolers with ice or ice packs

    For short trips or simple setups, a cooler with ice can still get the job done. They don't use power, they're cheap, and they're easy to pack and forget.

    But ice melts, takes up space, and can make a mess if food isn't packed carefully. There's no temperature control, and you'll need to drain and restock ice regularly. You may still want to carry a cooler as a backup or to store drinks separately from your main fridge.

    The bottom line

    For most truck campers, especially those spending time off-grid, we think a 12V compressor fridge or electric cooler is the best overall option. They're efficient, reliable, and a major step up from dealing with ice. Absorption fridges can still make sense in propane-heavy setups, and coolers are fine for weekends or backup use. Shop fridges & electric coolers.

    Inside a Scout Yoho pop-up camper
    Portable fridges/freezers provide a lot of flexibility. They can be removed to give back interior space, or used in a home or in the back of your truck when the camper is removed.

    The kitchen

    Cooking

    Cooking in a truck camper can be as simple or advanced as you want. The best setup depends on your space, power system, and how often you plan to cook.

    Propane stoves

    The most common option. Built-in two-burner stoves are reliable, don't use battery power, and pair well with campers that already use propane for heat or hot water. Many people also carry a small propane grill or cook outside to reduce heat and smells indoors.

    Induction cooktops

    Great for all-electric setups, fast and clean. They run on 120V AC, so you'll need a sizeable inverter (most cooktops pull about 1,800W, so a 2,000W inverter is the bare minimum and 2,200W or more is safer to cover startup surge) plus a battery bank big enough to handle that draw. Ideal if you're plugged in often or have a powerful off-grid system.

    Portable camp stoves

    Perfect for simple builds or outdoor cooking. Butane stoves are compact and clean-burning. Propane camp stoves are rugged and great for tailgating or picnics.

    Off-grid cooking

    You can always keep it low-tech with a fire pit or charcoal grill if conditions allow, just follow local fire rules.

    Man opening integrated sink and stovetop in AT Overland Flatbed Camper
    Some campers have 2-in-1 integrated sink and stovetop setups

    Water on board

    Water & shower systems

    Having water on board makes camper life feel less like camping and more like home. Whether you're rinsing off after a day at the trailhead or doing dishes at sunset, a simple system goes a long way.

    The basics

    Most setups include:

    • A freshwater tank, usually 5 to 30 gallons
    • A 12V pump or manual pump to move water to the sink or shower
    • A grey water tank or jug to collect used water

    You can also use jugs with spouts or gravity-fed setups for simplicity.

    How much water tank do you need?

    A rough guide — it depends on your camp style, how many people you travel with, and how often you can refill:

    5–10 gallons

    Weekend trips, or any trip where you'll always be near a water source. Covers drinking, cooking, and washing up.

    15–25 gallons

    Long weekends up to about a week for two people, with daily washing up and the occasional quick shower.

    25–40+ gallons

    Week-plus trips with regular showers, or full-time travel between fill-ups.

    Drinking water

    It's a good idea to consider a water purifier to ensure you have safe drinking water while on the road. Don't mistake a filter for a purifier, the two are very different. Check out the CDC's guidance on water disinfection for while hiking, camping, and traveling.

    Grayl offers a water purifier + filter in a compact water bottle format, and LifeSaver offers a larger version in a 5 gallon Jerrycan. The LifeSaver systems come standard in most Scout Campers.

    Hot water and showers

    Hot water isn't essential but adds comfort. Common options:

    Propane water heaters

    Built into many campers, can feed the sink and indoor or outdoor showers. Efficient and off-grid friendly.

    Electric heaters

    Require larger battery banks.

    Portable shower systems

    Some include built-in propane heaters.

    Solar shower bags

    Low-tech and ideal for summer use.

    Wet bath inside a Lance Squire SQ610 truck camper
    Enjoy the creature comforts of home, like this wet bath with sink, toilet & hot shower.

    Wet bath vs dry bath

    If a camper has a "wet bath" the toilet is in the shower area, while a "dry bath" separates them, taking more space but providing a roomier bathroom. Shop truck campers with a wet bath or a dry bath.

    The bathroom question

    Toilets

    Toilets vary by camper size and how self-contained you want to be. Here are the most common options.

    Type How waste is handled Notes
    Black tank toilets Fixed tank, emptied at RV dump stations Found in larger campers with full bathrooms. These systems are familiar but require plumbing, chemicals, and regular maintenance. Campers that have black tank toilets can often be converted to composting or dry flush.
    Cassette toilets Removable waste tank, emptied into a toilet or RV dump station Compact units with a built-in seat. Easier to manage than a full black tank but needs more frequent emptying.
    Composting toilets Liquids dumped daily; solids bagged for the trash or composted appropriately Use no water and separate liquids and solids. No dump station needed and no black tank to deal with. Many models are portable and popular for off-grid use.
    Dry flush toilets Each use is sealed in a plastic pouch that goes straight in the trash Battery-powered mechanism. No water, plumbing, or tanks needed. The tradeoff is cost, since every flush consumes a bag. CompoCloset's S1 combines dry flush with urine diversion (like a composting toilet), so only solids get sealed and liquids collect in a separate bottle. This cuts bag use significantly.
    Portable toilets Small tank or special waste bags, manually emptied Budget-friendly and simple. A good option for weekend trips or minimal builds.

    You can also skip a toilet entirely and rely on public restrooms or a shovel. Always follow proper local waste disposal guidelines. Shop truck camper toilets.

    Portable toilet in a Scout camper
    There's a toilet for almost every space, so don't let the size of the camper limit you.

    Where you'll actually sleep

    Sleeping arrangements

    How and where you sleep is one of the most personal decisions in a truck camper build, and it's easy to overlook until you're standing in a showroom trying to picture two people getting in and out of a cabover bed at 2am to pee. This section covers bed orientation, mattress sizing, dinette conversions, and rooftop tent add-ons, so you know what to factor into your decision-making.

    Even the thinner camper mattresses can be exceedingly comfortable (hello, Lone Peak), but it's always worth testing them in person for your specific sleep style. And remember, a mattress is also something you can replace fairly easily if you have specific sleep needs.

    Note

    If you're going down the truck cap or topper route, and the one you're looking at doesn't come with a mattress, you'll still want to note the space dimensions and bed area orientation, especially for any custom mattress you purchase later.

    Cabover bed orientation: north-south vs. east-west vs. both + add-ons

    These terms describe how the bed sits relative to your truck, not compass direction. It's one of the most debated layout choices in any truck camper, and there's no universally "right" answer, just tradeoffs.

    East-west cabover bed in an OVRLND camper topper

    East-West (across the truck)

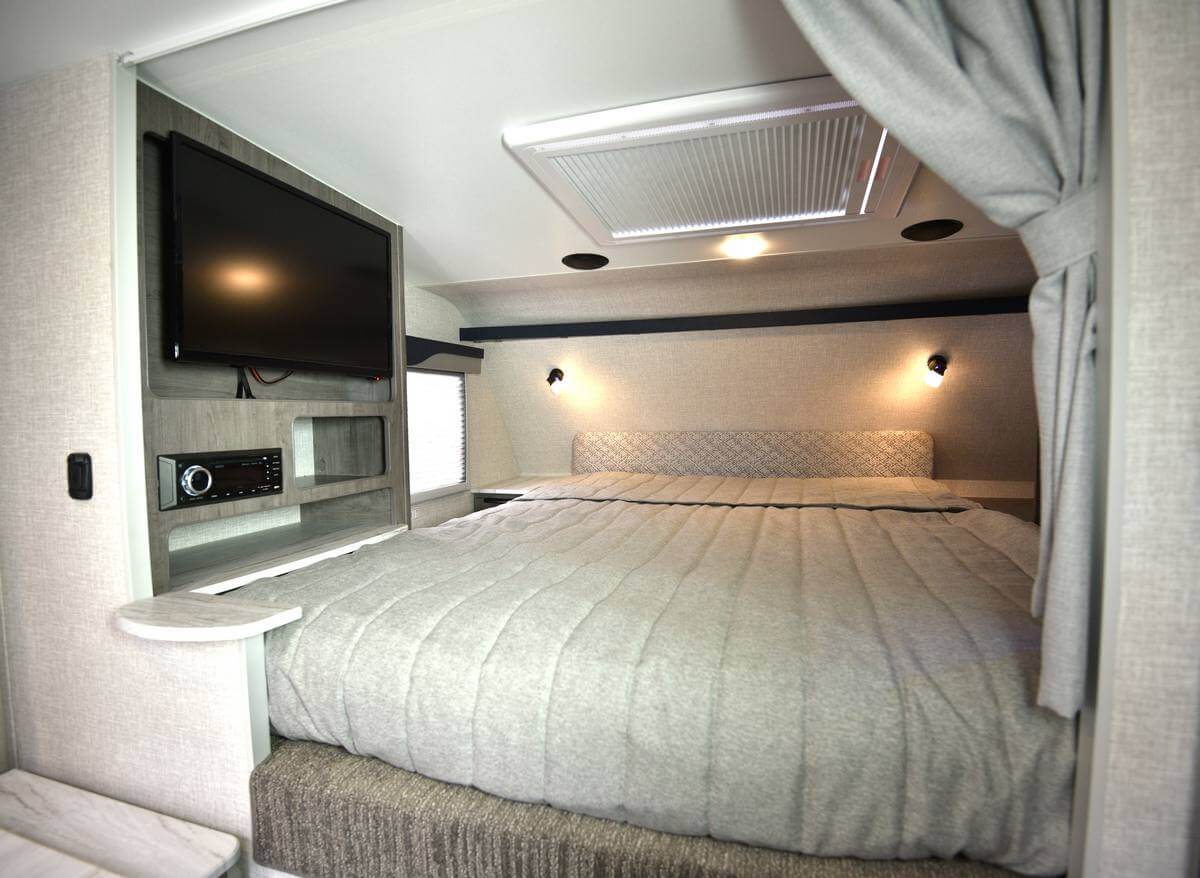
    The traditional layout, and still the most common. The bed runs side to side over the cab, so it only needs to span the width of the camper rather than stretching the full length of the cabover. That keeps the cabover shorter and the camper lighter. The tradeoff is getting in and out: with two people, one person has to climb over the other, which can get old fast on a multi-week trip.

    Best for
    Suits solo travelers, couples who don't mind climbing over each other, or anyone prioritizing a lighter, shorter camper.
    North-south cabover bed with side storage in a Lance truck camper

    North-South (front to back)

    The bed runs parallel to the truck, usually with the head toward the cab. This means both people can get in and out independently, without crawling over each other, and it typically opens up storage space along the sides of the bed (e.g. in Lance campers). The catch is length: most campers need to extend the cabover ~18 inches or more into the nose to fit a full queen this way, which can add weight and can push the camper's overhang further past your tailgate or eat into your interior space. That's worth checking against the overhang, center of gravity and payload guidance we mentioned earlier.

    Best for
    Suits couples who want independent access and side storage, and are willing to trade some weight and length for it.
    Interior of a Scout Yoho pop-up truck camper

    Both, on some models

    A handful of manufacturers offer an expandable or slide-out bed extension that lets the same camper sleep either direction (like Scout). Bear in mind, an extension can eat into the interior space when it's pulled out. But if flexibility matters, ask whether this is offered on the model you're considering.

    Mattress types and sizing

    Camper mattresses rarely match residential sizing, which catches a lot of first-time buyers off guard. But more manufacturers are starting to offer standard queen size, and some even with a "king size" extension. If the sheet fits…

    They're also not as deep as your residential mattress: pop-up toppers like the Lone Peak will have the lowest profile mattress (although still quite comfortable in our camping experience). Some will allow you to keep your bedding and pillows arranged, others won't. Slide in or flatbed pop-ups will be slightly thicker, in the range or 4-5″ thick, as they have to accommodate the roof closing, with or without all your pillows and bedding still arranged. Hard side campers tend to offer thicker mattresses because the headroom exists, and you can absolutely pile on all your bedding and other gear while under way.

    Low-profile mattress and bed ladder in a Lone Peak camper
    Pop-up toppers run the lowest-profile mattresses, since the roof has to close over them. They can still be very comfy; we love the mattress on the Lone Peak.
    • Sizing: Manufacturers often list a mattress as "queen" or "full," but the actual dimensions are frequently shorter and narrower than a residential mattress of the same name, shaped to fit the cabover footprint. Don't assume a fitted sheet from home will work, check the specs first.
    • Material: Factory pads are commonly some kind of foam (single or layered) or basic innerspring and can be thinner than what most people sleep on at home. Upgrading to a memory foam or hybrid topper is one of the most common and highest-impact comfort upgrades owners make.
    • Condensation: In cold weather, moisture can build up underneath a mattress that sits directly against an exterior wall or an insulated pop-up roof, especially without airflow beneath it. A slatted platform, Froli system, moisture-wicking pad, or occasionally turning and airing out the mattress helps prevent this. Worth pairing with the four-season guidance in the heating & cooling section.

    Dinette conversions

    Most truck campers include a dinette that converts to a second sleeping area, but "converts to a bed" means very different things depending on the model, and this is one of the most common points of confusion for buyers traveling with family.

    • Kid-sized vs. adult-capable: Some dinette conversions are only sized (or only comfortable) for a child or a single smaller adult. Others convert to a genuine second full or queen bed that two adults can sleep in. If you're planning to travel with a family or a second couple, confirm which category the model you're looking at falls into; don't assume.
    • Conversion effort: Some dinettes convert in seconds (cushions rearrange, table drops into place). Others require more disassembly. If you expect to use the dinette bed nightly rather than occasionally, ask how quick and how permanent the conversion is, since a cumbersome nightly routine tends to mean it stops getting used.
    • Bunk / Cot add-ons: Some models also offer an additional sleeping area that creates a bunk bed over the dinette conversion. This sleeping arrangement is one the kids will certainly love. Some brands use bunks / cots that quickly stow away, while others are more fixed. In our lineup, Adventurer and Lance offer a bunk bed over the dinette in certain models.
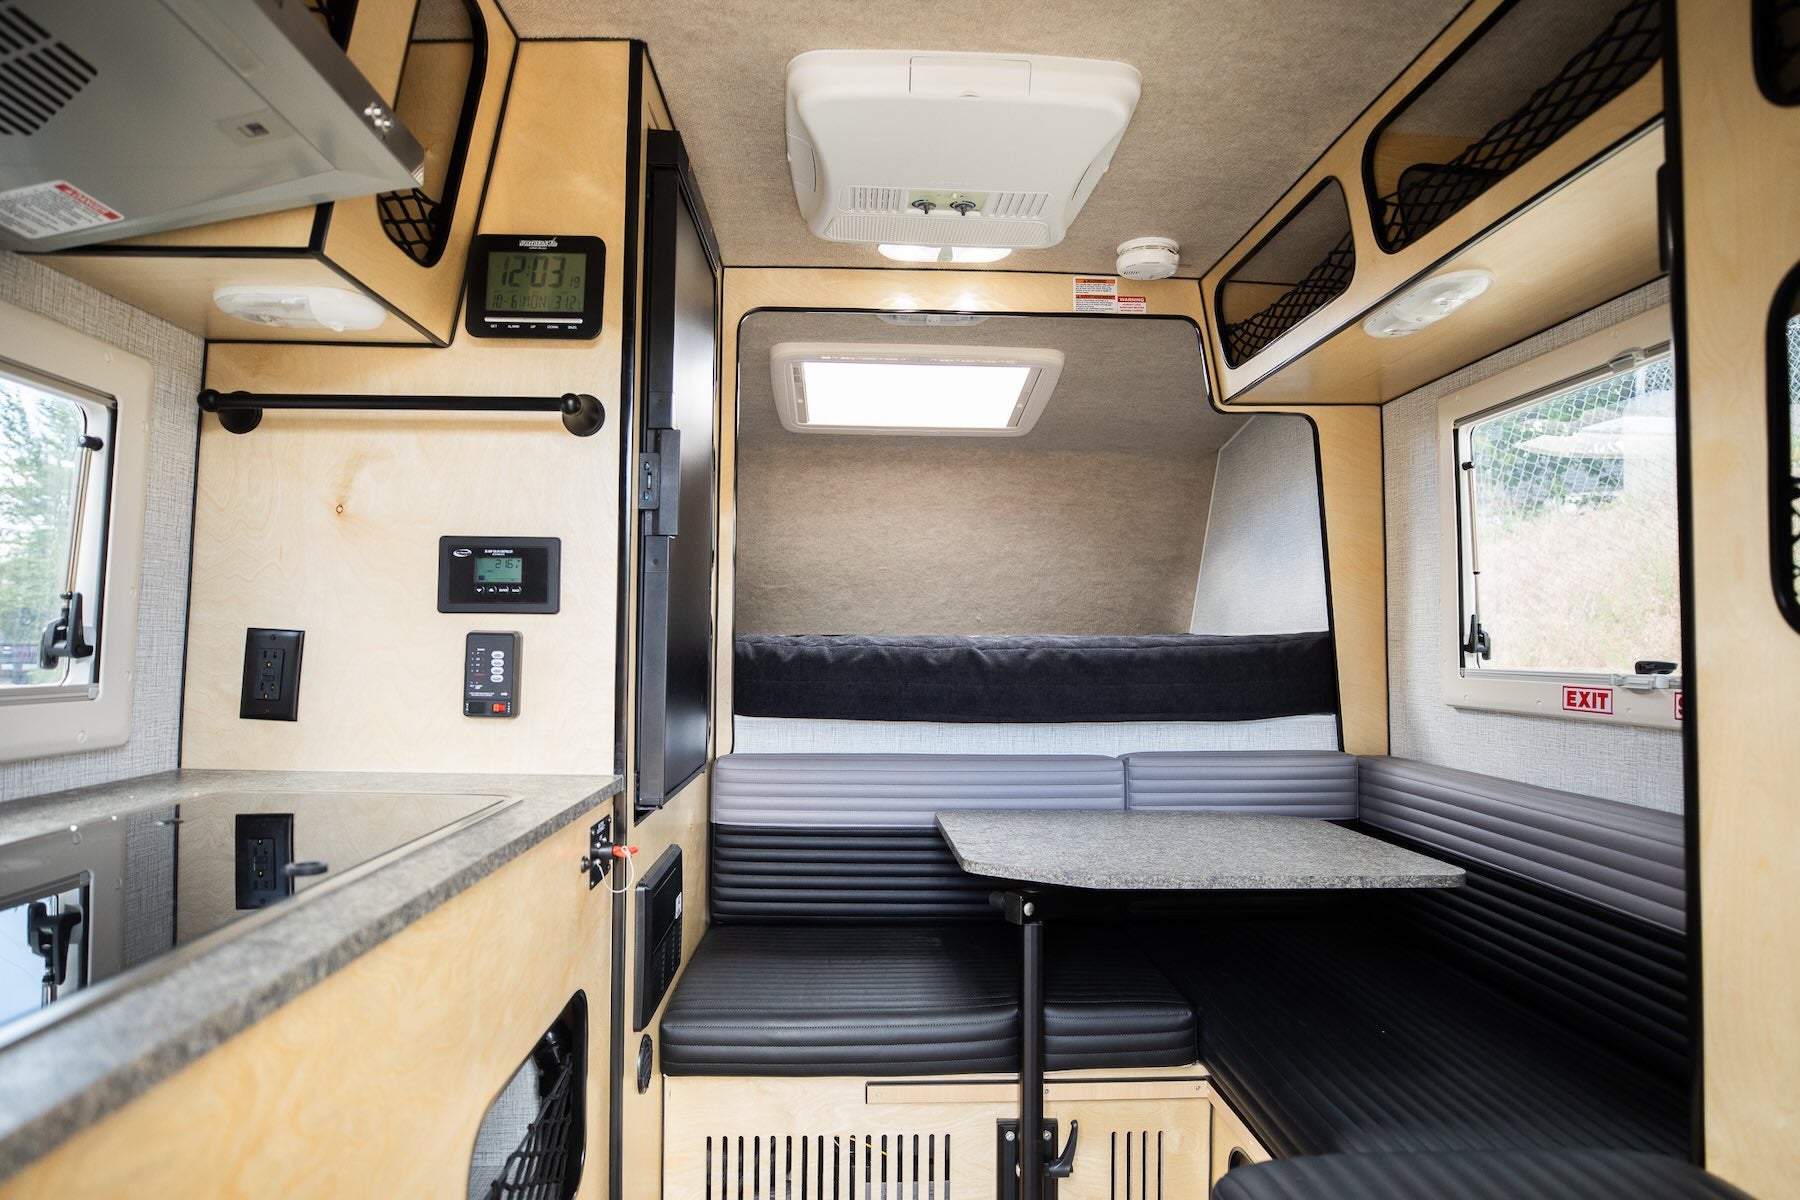
    Dinette seating inside a Northern Lite 610 truck camper
    Most dinettes convert to a second sleeping area — how big, and how easily, varies a lot by model.

    Rooftop tent add-ons

    For hard-side campers, a rooftop tent is a genuine way to add real sleeping capacity without adding interior floor space, and it's a feature worth understanding well since it changes both the camper's capability and its weight distribution.

    The GFC (Go Fast Campers) V2 Pro is the rooftop tent option offered on Scout's Olympic and Kenai hardwall models. A few things worth knowing:

    • Capacity: Adds sleeping space for two additional people, so a Scout Kenai with the GFC option can sleep up to six total between the cabover, dinette, and rooftop tent.
    • Setup: Opens in two steps, unlatch and push, with no poles or assembly.
    • Interior passthrough access: This is the standout feature. A built-in hatch (positioned above the dinette on the Olympic) lets you climb up into the rooftop tent from inside the camper, so nobody has to exit into the weather or climb an exterior ladder in the dark just to get to the second sleeping level.
    • Dimensions: The standard platform tent is 53″×97″ exterior, closes down to just 6 inches thick, and opens to 90″×56″ of interior space with 55 inches of peak height.
    • Weight and mounting: It mounts on gear-ready roof racks, and weight/pricing reflects the tent and rack together. Because it adds real weight up high, it's worth reviewing alongside your truck's payload capacity and how that affects center of gravity, especially if you plan to spend meaningful time off-road. It's also generally not combinable with other roof-mounted tent options, so it's an either/or choice at the ordering stage.
    Scout Kenai hard wall truck camper at camp
    The GFC V2 Pro rooftop tent is offered on Scout's Olympic and Kenai hardwall models.

    Best for: Families or groups who want to sleep more people than the interior alone allows, without towing a second vehicle or building out a larger, heavier camper.

    Sleeping capacity at a glance

    A simple way to compare campers is by total sleeping capacity rather than trying to add up cabover, dinette, and any add-ons yourself.

    Sleeping area Typical capacity Notes
    Cabover bed 1–2 adults Orientation (N-S vs E-W) affects comfort more than capacity
    Dinette conversion 1 child, or 1–2 adults Varies significantly by mode, always confirm
    Rooftop tent 2 adults Available on select hardwall models
    Combined (cabover + dinette) 2–4 Most common total for a family-oriented layout
    Combined (cabover + dinette + RTT) Up to 6 Available where a rooftop tent option exists

    Common mistakes

    • Assuming a "queen" mattress spec means residential queen dimensions and bedding.
    • Not confirming whether a dinette bed can accommodate adults or just kids.
    • Choosing north-south sleeping without checking the impact on cabover length, interior creep, overhang, and payload.
    • Adding a rooftop tent without accounting for the added weight.
    • Overlooking ventilation under the mattress, especially in cold-weather or pop-up setups.

    Living space

    Seating

    Seating is an important part of comfort and usability in a camper, especially when space is limited. Most truck campers include a dinette, with two benches and a table that often converts into a bed.

    Lance camper dinette seating in face-to-face set up
    If the weather outside is frightful, it's good to have a comfortable place to relax and eat.

    Some layouts feature a side bench or small sofa, while others use Lagun-style tables for flexible, space-saving setups that swivel and adjust easily. In smaller campers, the bed or entry area often doubles as a seating space.

    Many DIY and custom builds use modular or built-in seating tailored to storage needs or specific use cases, like work-from-the-road setups or families needing extra space. If you have a layout in mind, we build custom interiors.

    Straight answers

    Frequently asked questions

    Have a question about your own truck, camper, or situation? Reach out and we'll talk through your specific setup.

    The best place to start is your truck's payload sticker located inside the driver's door. Compare that payload rating to the fully loaded (wet) weight of the camper, plus passengers, pets, gear, aftermarket accessories, and anything else you'll be carrying. Payload, not towing capacity, is the number that determines whether a truck and camper are a safe match.

    If you don't already own a truck, we generally recommend choosing your camper first. Once you know the camper's loaded weight and intended use, it's much easier to purchase a truck with the right payload, bed length, and suspension from the start. Buying the truck first can unnecessarily limit your camper options.

    Yes. While staying within your truck's rated payload is essential, having additional payload capacity improves handling, braking, suspension performance, and leaves room for future upgrades like bumpers, larger tires, solar systems, or extra batteries.

    If your trips primarily involve highways, four-season camping, or extended travel, a hard-side camper generally offers more comfort, insulation, and interior storage. If your goal is exploring rough roads, narrow trails, and remote campsites, a pop-up camper's lower center of gravity and reduced height often make it the better choice.

    For most travelers using lights, a refrigerator, fans, and charging electronics, 100–200Ah of lithium battery capacity is a comfortable starting point. If you plan to work remotely, run an induction cooktop, or power air conditioning off-grid, you'll likely want a substantially larger electrical system paired with solar and alternator charging.

    Not always. Many properly matched truck and camper combinations drive well with factory suspension. Suspension upgrades become more valuable as you approach your truck's payload capacity or spend more time on rough roads. Their purpose is to improve ride quality, stability, and handling, not increase your truck's legal payload.

    Both have advantages. A new camper offers the latest features and manufacturer warranty, while a well-maintained used camper can provide excellent value. When shopping used, pay close attention to water intrusion, roof condition, seal maintenance, appliances, and structural repairs before making a purchase. Browse our used campers.

    For most buyers, we recommend prioritizing lithium batteries, solar charging, alternator charging, quality suspension components, compressor refrigerators, and heating systems before cosmetic upgrades. Investing in the systems that improve reliability and off-grid capability usually provides more long-term value than luxury features.

    Truck campers require routine maintenance like any RV. Regularly inspecting roof seals, servicing batteries, winterizing plumbing, checking tie-down hardware, and maintaining appliances will help prevent costly repairs and extend the life of your camper. See our repairs & service.

    Many owners build their truck camper over time. Electrical systems, solar, suspension, storage solutions, refrigeration, and accessories can often be upgraded later. It's usually worth investing in the right camper platform first, then adding features as your travel style evolves.

    The most common mistakes are focusing on towing capacity instead of payload, underestimating the weight of gear and passengers, buying more camper than they need, and overlooking how they'll actually use the camper. Thinking through where you'll camp, how long you'll travel, and how much time you'll spend off-grid usually leads to better long-term decisions.

    Absolutely. Floor plans, storage, headroom, and overall livability are difficult to judge from photos alone. Walking through multiple truck camper brands side by side is often the fastest way to narrow your options and understand which features matter most for your style of travel. Come visit us.

    The Truck Camper Garage team with customers and their rigs

    Still deciding?

    Come see them in person

    Floor plans, storage and headroom are hard to judge from photos. Walk through the brands side by side, tell us how you actually travel, and we'll help you match a camper to your truck.